TL;DR — Diagnose a charge controller error in 5 minutes
A charge controller error rarely means a dead controller. About 80% of fault codes are the controller protecting itself from a fixable condition. Three causes dominate. Low battery voltage that won't let the controller boot — fix with a standalone charger. Over-voltage from too many panels in series on a cold morning — fix with parallel rewiring or a controller rated for higher PV input. Over-temperature from a controller mounted in still air — fix with ventilation or relocation. The diagnostic sequence: measure battery voltage at the controller terminals, then perform a hard reboot by disconnecting PV first, battery second, waiting 60 seconds, reconnecting battery first, then PV. If the fault returns after that sequence, the controller has actually failed.
It's a cloudless Tuesday at 1 PM. The array is in full sun. The battery monitor is dropping — not rising, dropping — and his coffee maker just cut out mid-brew. He walks to the power closet and sees what he didn't want to see. A flashing red light on the Victron. "Error 20" on the display. The whole system is dead in the middle of perfect weather. He's two days into a new build, three hundred miles from the nearest dealer, with a wife and two kids inside expecting hot water by sundown. He pulls out his phone and Googles "Victron Error 20 fix." Forty minutes of forums later he's no closer to an answer than when he started. He's looking at the controller like it's a sealed box that broke for no reason. It isn't. The controller is screaming a specific message, in a specific language, about a specific problem somewhere else in the system. The fault code isn't the failure. It's the symptom. And until he learns to read it, he's going to keep ordering parts he doesn't need.
Who this is for
This guide is for the new homeowner in Colorado who walked out to the equipment shed and found a fault code blinking on a controller he didn't install. The Florida hurricane-prep family who powered the system back up after a storm and got "Error 31" instead of the green light they expected. The Arizona homesteader whose controller throws an over-temperature fault every July when the equipment shed hits 110°F. The Vermont retiree whose system started reporting "low voltage disconnect" every cold morning around 5 AM and clearing itself by 9. The Texas first-time off-gridder who wired in a fifth panel last weekend and now the whole array won't charge. The Oregon cabin owner whose Renogy controller booted into a fault code the morning after a lightning storm rolled through the valley. The Pennsylvania DIYer who replaced his battery bank and got six different error codes in the first 48 hours before he learned to read the sequence.
Three things are true of every one of them.
The controller isn't trying to ruin their day. The controller is trying to prevent a fire.
The fault code is a translation, not a verdict.
Nobody hands you the decoder ring with the controller.
This article is the decoder ring.
The "false dead" controller
Most DIYers see a fault code and order a replacement. Most of them are wrong. About 80% of charge controller errors are protection responses, not hardware failures. The controller has detected a condition outside its safe operating envelope and shut down to prevent damage somewhere else in the system. Until you fix the upstream condition, a brand new controller will throw the same fault code five minutes after you install it.
The controller is the middleman of your power plant. Power comes in from the panels, gets regulated, goes out to the batteries. If the input is wrong (too much voltage, reversed polarity, mismatched ground) the controller blocks it. If the output destination is wrong (battery too low, battery disconnected, battery too hot) the controller blocks it. If the controller itself is in trouble (over-temperature, internal fault, firmware glitch) it blocks itself. Three blocking conditions, one symptom on the screen.
Your job isn't to fix the controller. Your job is to figure out which of those three blocking conditions is happening, then fix the actual problem.
WATTSON'S CONTROLLER TRUTH: I had a guy call me three years ago furious that his "garbage Renogy" had failed twice in six months. I drove out to the property. The controller was mounted on the wall of a metal shed in full Arizona sun, no fan, no shade, no ventilation. The controller was reading 158°F internal temperature when I walked up. It wasn't broken. It was screaming at him to move it somewhere it could breathe. We relocated it to the cool side of the shed, added a $12 USB fan, and that controller is still running today. He wanted to blame Renogy. The problem wasn't Renogy. The problem was that he installed a piece of electronics in a place where electronics die.
Stop guessing at fault codes. Get the error key.
Wattson's Charge Controller Error Code Translation Key — the one-sheet reference that decodes fault codes from Victron, EPEVER, Renogy, and Morningstar. Print it, post it next to your controller, never search a 200-page manual again.
GET THE ERROR KEY →The 5-minute quick diagnosis for a charge controller error
Before you touch a wire, do this sequence. Most charge controller error problems reveal themselves in the first five minutes if you measure the right things in the right order.
Step 1: Read the actual fault code
Photograph the display. Write down the exact error number, letter code, or blink pattern. If the controller blinks instead of showing text, count the blinks between pauses — three blinks means error 3, five blinks means error 5. Don't guess. Don't paraphrase. Write down exactly what you see.
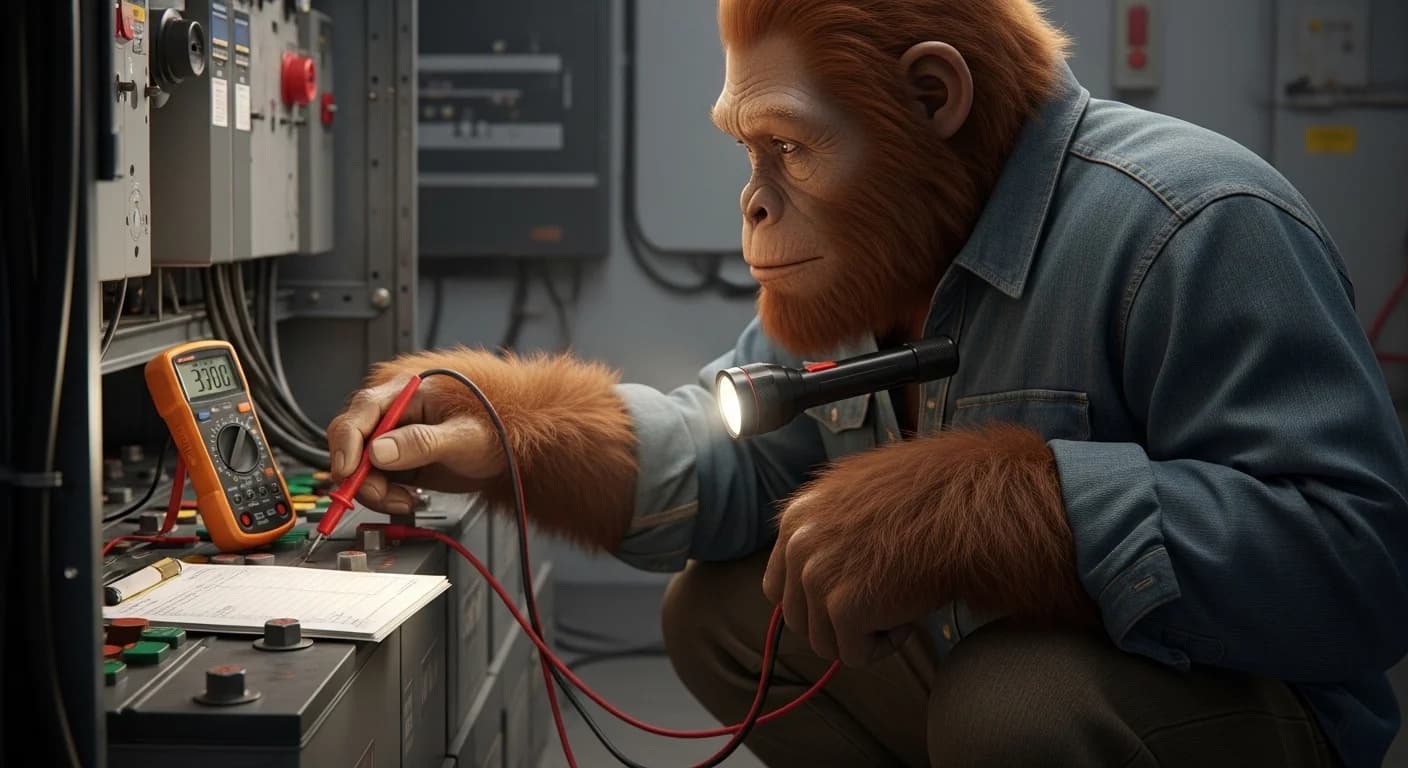
Step 2: Measure battery voltage at the controller terminals
Get a multimeter. Set it to DC volts. Touch the probes to the battery input terminals on the controller itself — not the battery posts, not the battery monitor, the controller. You're checking whether the controller is actually seeing the battery.
For 12V systems: healthy reading is 12.0-14.4V depending on state of charge. For 24V systems: 24.0-28.8V. For 48V systems: 48.0-57.6V. If you read 0.0V or anything below the low end of the range, the controller can't see the battery. You have a wiring or fuse problem, not a controller problem.
Step 3: Measure PV voltage at the controller terminals
Same multimeter, same controller, different terminals — the PV input side. During daylight you should see voltage that matches your array's expected output, typically 50-150V for residential MPPT systems. If you read 0.0V during full sun, you have a tripped DC breaker, a blown PV fuse, or a disconnected string somewhere between the array and the controller. Not a controller problem.
Step 4: Check controller temperature
Touch the case (carefully — it can be warm). If it's too hot to keep your hand on, you have an over-temperature condition. The case should be warm during peak charging but never uncomfortable. Hot case = ventilation problem, not a controller problem.
Step 5: Match the fault code to the three big causes
The vast majority of fault codes across every major brand map to one of three causes.
Charge controller error code translation: the big three
Over-voltage (Victron Error 33, EPEVER E01, Renogy "Over PV V")
The PV input voltage exceeded the controller's maximum rated input. Most common cause: too many panels wired in series, and on a cold morning their voltage climbed above what would normally show on a warm day. Solar panel voltage rises as temperature drops — a string that reads 145V at noon in July can read 165V at 7 AM in January. If your controller is rated for 150V max input, the controller protected itself the moment the cold-morning voltage exceeded that ceiling.
Fix: Rewire the string in parallel groups instead of pure series, or upgrade to a controller with a higher PV input ceiling. Don't ignore this — running a controller at or above its PV rating will eventually destroy it.
Low-voltage (Victron Error 31, EPEVER E02, Renogy "Low Batt")
The battery voltage dropped below the controller's wake-up threshold. The controller can't operate without a minimum battery voltage to power its own electronics. For most 12V controllers that threshold is around 10V. Below it, the controller refuses to boot, which means it can't charge the battery, which means the battery stays dead, which means the controller stays asleep. Classic deadlock.
Fix: Use a standalone AC charger (any decent 10-amp lead-acid charger or LiFePO4 charger) to bring the battery bank above its nominal voltage. Once the bank reads 12.6V (or 25.2V, or 50.4V depending on system voltage), reconnect the controller and let it take over.
Over-temperature (Victron Error 17, EPEVER E03, Renogy "OT Fault")
The controller's internal temperature exceeded its safe operating range, typically 158-185°F depending on model. Cause: mounted in dead air, mounted in direct sun, mounted near a heat source, ambient temperature in the equipment space too high during peak charging hours.
Fix: Improve airflow. Add a small USB fan to move air across the heatsink fins. Relocate the controller to a cooler wall, ideally the north-facing side of the shed or basement. Make sure the manufacturer's clearance specs are honored — most controllers need 4-6 inches of free space on all sides.
The hard reboot sequence for a stuck charge controller error
When the fault code persists after you've fixed the upstream condition, the controller's internal state can stay stuck on the old fault. A hard reboot clears it.
The sequence matters. Out-of-order, you can damage the controller.
- Disconnect PV first. Open the DC breaker between the array and the controller, or pull the PV fuse. Verify with your multimeter that the controller's PV terminals read 0V.
- Disconnect the battery second. Open the battery DC breaker, or pull the battery fuse. The controller's display will go dark.
- Wait 60 seconds. This drains the internal capacitors and clears the volatile memory holding the fault state.
- Reconnect the battery first. Close the battery breaker. The controller boots up and reads battery voltage. Display should come back on. No fault should appear.
- Reconnect the PV second. Close the PV breaker. Within a few seconds the controller should detect PV voltage and begin charging.
If the fault returns after this sequence, the controller has actually failed and needs replacement. If the fault doesn't return, you've cleared a stuck state and the controller is fine.
Critical: Never disconnect the battery while the PV is still connected. With no battery to absorb the power, the PV voltage on the controller can spike past the maximum input rating and destroy the MPPT circuit. Battery is always the last thing disconnected and the first thing reconnected.
WATTSON'S SEQUENCE TRUTH: The order I just gave you isn't a suggestion. I learned it the hard way at the US Solar Institute when an instructor watched me reverse the sequence on a training bench and let me kill a $400 controller as a teaching moment. Sun goes in last, comes out first. Battery goes in first, comes out last. PV is the dangerous side because it has nowhere to send the power if the battery isn't there to receive it. Get the order wrong and the controller does what a controller does when there's no path for the electrons — it sacrifices itself to protect the rest of the system.
When the controller has actually failed
Some symptoms mean the controller is genuinely dead and replacement is the only option.
- The display stays dark even with verified battery voltage at the controller terminals
- The case is physically damaged, melted, swollen, or shows scorch marks
- You smell burning plastic or ozone near the controller
- The fault code returns immediately after every hard reboot regardless of upstream conditions
- Voltage readings on the controller's display don't match what your multimeter reads at the same terminals (controller is misreading)
- Charge amps stay at zero even when PV voltage is high and battery voltage is below absorption setpoint
Any of these means the controller's internal electronics are compromised. Replace it. Don't try to fix it. Internal solar controller electronics aren't user-serviceable, and the warranty almost certainly doesn't cover whatever caused the failure.
According to National Renewable Energy Laboratory long-term reliability testing, charge controllers have one of the longest mean-time-to-failure ratings of any solar component, typically 15+ years under reasonable operating conditions. If yours failed within the first five years, the operating conditions weren't reasonable. Look at temperature, look at over-voltage exposure, look at battery chemistry mismatch in the controller settings.
When to stop and call a pro
Stop immediately if any of these conditions are present.
- You smell ozone, burning plastic, or rotten eggs (battery off-gassing — extreme fire risk)
- You see smoke or scorch marks anywhere on the equipment
- You feel any tingle when touching the metal case of the controller or any adjacent component
- You see exposed copper, melted insulation, or arcing at any connection
- The battery cases near the controller are bulging, leaking, or warm to the touch
- Your charge controller fault code includes any reference to "ground fault" or "isolation fault"
A ground fault on a DC solar system isn't a DIY repair. It requires specialized insulation resistance testing and code-compliant repair work. Call a licensed solar electrician.
Frequently asked questions
Can I run a charge controller without a battery connected? Never. The controller depends on the battery as the destination for the regulated power coming from the panels. Without a battery, the PV voltage on the controller can spike past the input rating and destroy the MPPT circuit. Always connect the battery first, then the PV. Always disconnect the PV first, then the battery.
My controller display is dark but I have voltage at the terminals. What's wrong? The internal electronics have failed. Voltage at the terminals confirms the wiring and fuses are fine — power is reaching the controller but the controller isn't powering up. Replace the unit.
Is it normal for my controller to be hot to the touch? Warm is normal during peak charging. If it's too hot to keep your hand on the case, it's running outside its safe temperature range. Improve airflow before the over-temperature fault code shows up. Add a small fan, relocate to a cooler wall, or check the clearance around the unit.
Why does my controller throw "low voltage" only on cold mornings? Battery capacity drops with temperature. A lead-acid bank at 32°F has roughly 80% of the capacity it shows at 77°F. The voltage sags overnight under standby loads, and the cold reduces the bank's ability to recover. Insulate the battery enclosure, add temperature compensation to the charge controller settings, or upgrade to LiFePO4 which performs better in cold but requires a low-temperature charging cutoff.
Why does my controller fault on cold mornings with over-voltage errors? Solar panels produce higher voltage when they're cold. A string that's safe at noon in summer can spike past the controller's input rating at 7 AM in January. If you wired your panels in series without checking the cold-temperature voltage (Voc), you may have exceeded the controller's maximum input. Rewire some of the strings in parallel, or upgrade to a controller with a higher PV input ceiling.
The fault clears itself after a few hours. Should I still worry? Yes. A fault that clears itself means the upstream condition (temperature, voltage, load) cycled in and out of the safe zone. The controller is on the edge of its operating envelope. The next time conditions go further out of spec, the fault will be permanent or the controller will fail. Fix the root cause now.
Can I reset the controller by pulling the battery fuse and reinserting it? No. That reverses the safe sequence and risks destroying the MPPT circuit if PV is still connected. Always disconnect PV first, then battery, wait 60 seconds, reconnect battery first, then PV. The order isn't optional.
My controller says it's charging at 0 amps. PV voltage is high. What's wrong? The controller has entered protection mode and stopped passing current. Most common causes: battery is already at absorption setpoint (normal — system is fine), battery is too hot to charge safely (check battery temperature), or the controller's temperature compensation has cut off charging because of an ambient or battery temperature reading outside the safe range. Check the controller's settings against the battery manufacturer's spec sheet.
Do I need to call a professional for every charge controller error? No. About 80% of fault codes resolve with the 5-minute diagnostic and the hard reboot sequence in this article. Call a professional only if the fault persists after upstream causes are fixed, or if the symptoms include burning, smoke, ground faults, or any tingle on metal cases.
How long should a charge controller last? A well-installed, well-ventilated, properly-sized charge controller running within its spec sheet should last 15-20 years. If yours failed in 5 or fewer, look at the operating environment — temperature, over-voltage exposure, battery chemistry mismatch in the settings, or undersized cooling.
Will a fault code void my warranty? Almost never. Warranties cover internal electronic failures, not user-caused damage from wiring errors or environmental exposure. If your controller fails inside the warranty window and the failure isn't traceable to a wiring or installation mistake, file the warranty claim with confidence.
Conclusion
A charge controller error is a translation, not a verdict. The controller is telling you something specific went outside its safe envelope. Until you figure out which condition triggered the charge controller error — over-voltage, low-voltage, or over-temperature — replacing the controller won't fix anything.
The 5-minute diagnostic finds the cause for 80% of charge controller errors. Measure battery voltage at the controller terminals. Measure PV voltage at the controller terminals. Touch the case to check temperature. Match the fault code to the three big causes. Fix the upstream condition. Hard-reboot in the right sequence. If the charge controller error returns, then the controller has actually failed.
Don't order a replacement controller until you've worked the diagnostic. Eight times out of ten, the controller is fine and the problem is somewhere else in the system. Replace the wrong part and you'll be back here next week, staring at the same flashing red light.
The complete Maintenance & Troubleshooting guide →